Donate
| Chapter | 3. | CLOTHING | ||
| Initial Clothing Allowance | 13 | 7 | ||
| Identification marking | 14 | 7 | ||
| Attaching Insignia | 15 | 8 | ||
| Care and Maintenance | 16 | 10 | ||
| Section | II. | PROTECTIVE CLOTHING | ||
| General | 17 | 10 | ||
| Cold-Weather Clothing | 18 | 10 | ||
| Hot Weather Clothing | 19 | 11 | ||
| Wet Weather Clothing (Rain suit) | 20 | 11 | ||
| Armor Vest | 21 | 12 | ||
| Helmet, Helmet Liner, and Camouflage band | 22 | 13 |

13. Initial Clothing Allowance The Army furnishes you with an initial clothing allowance consisting of prescribed items of personal- type clothing and service uniforms, with component items. Table 2 lists the items which make up the initial clothing allowance. If you did not receive some of the listed items when you processed, you will receive them at a later date.
| 1. | Bag, duffel, OD | 1 each |
| 2. | Belt, trousers, cotton webbing | 2 each |
| 3. | Boots, combat, leather | 2 pair |
| 4. | Buckle, belt, brass | 1 each |
| 5. | Cap, garrison, AG-344 | 1 each |
| 6. | Cap, service, wool serge, AG-44 | 1 each |
| 7. | Cap, utility, OG-106 | 2 each |
| 8. | Coat, wool serge, AG-44 | 1 each |
| 9. | Coat, wool polyester, AG-344 | 1 each |
| 10. | Drawers, cotton, white | 6 pair |
| 11. | Glove, inserts, wool and nylon, OG-108 | 2 pair |
| 12. | Gloves, shells, leather, black | 1 pair |
| 13. | Handkerchiefs, cotton, white | 6 each |
| 14. | Insignia, BoS, EP | 1 each |
| 15. | Insignia, EP, US | 2 each |
| 16. | Insignia, cap, service | 1 each |
| 17. | Necktie, black | 2 each |
| 18. | Overcoat, wool gabardine, AG-44 | 1 each |
| 19. | Raincoat, cotton and polyester, AG-274 | 1 each |
| 20. | Shirt, cotton, khaki, short sleeve | 3 each |
| 21. | Shirt, cotton polyester, Shade 446 | 3 each |
| 22. | Shirt, cotton sateen, utility, OG-107 | 4 each |
| 23. | Shoes, dress, black oxford | 1 pair |
| 24. | Socks, nylon and cotton, black | 3 pair |
| 25. | Socks, cushion sole, OG-408 | 5 pair |
| 26. | Towel, bath, white | 2 each |
| 27. | Trousers, cotton khaki | 3 pair |
| 28. | Trousers, wool serge, AG-44 | 1 pair |
| 29. | Trousers, wool polyester, AG-344 | 2 pair |
| 30. | Trousers, cotton sateen, utility, OG-107 | 4 pair |
| 31. | Undershirt, cotton, white | 6 each |
14. Identification Marking
Certain items of your clothing must be clearly marked with your name and social security account number. These items are listed in b below; do not mark any other item.
a. Marking Methods.
Mark the items with stencil, pen, or rubber or metal stamp, using indelible, waterproof marking inks. When marking your name, use your first name and middle initial (or your first initial and middle name) with your last name. Place your social security account number either after your name and on the same line with it, or beneath your name. See inset, figure 5. For all items except the duffel bag, letters and numerals should be at least one-eighth of an inch, but no more than one-half inch, high. For the duffel bag, they should be at least 1 inch, but no more than 2 inches, high. Use both white and black marking inks, as appropriate.
b. Marking Clothing Items.
Mark the items listed below in the proper locations (fig 5).
(1) Boots and shoes. Mark each boot and shoe in black on the inside right quarter, near the top.
(2) Service, garrison, and utility caps. Mark each cap in black on the inside of the sweatband at the right-front side of the wearer. Mark under the sweatband if the band turns down.
(3) Helmet-liner headband. Mark the headband on the right-front side of the wearer. Headbands worn by basic trainees may be marked on the right or left side, as space permits.
(4) Belts. Mark the belts in white on the inside, about 6 inches from the metal tip.
(5) Duffelbag. Place the duffelbag on a flat surface, with the handle facing up and the bottom to the right. Mark the bag in black as illustrated in figure 5, making sure the last letter of your last name is even with the top of the "US" mark.
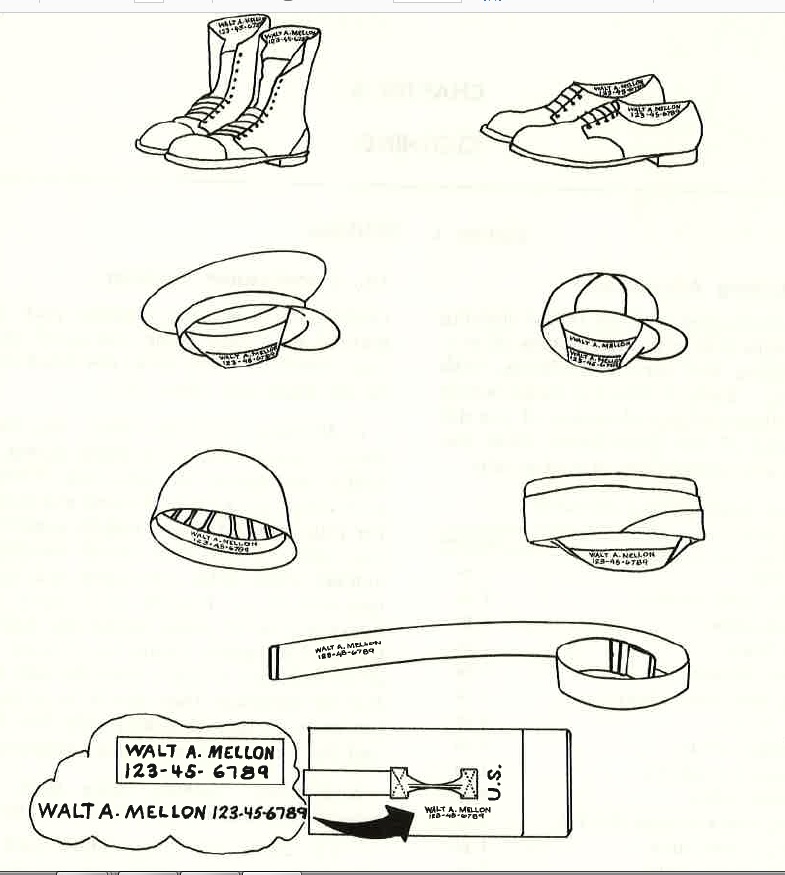
Figure 5. Locations for marking items.
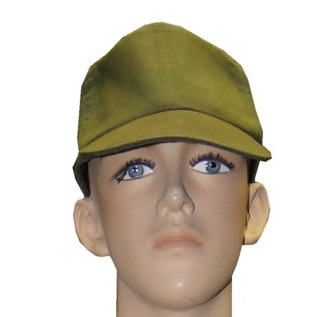
Figure 5a. Field cap.
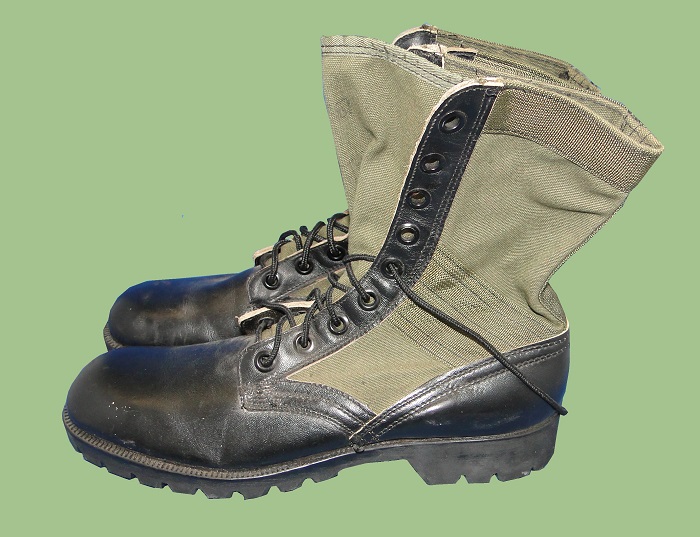
Figure 5b. Jungle boots.
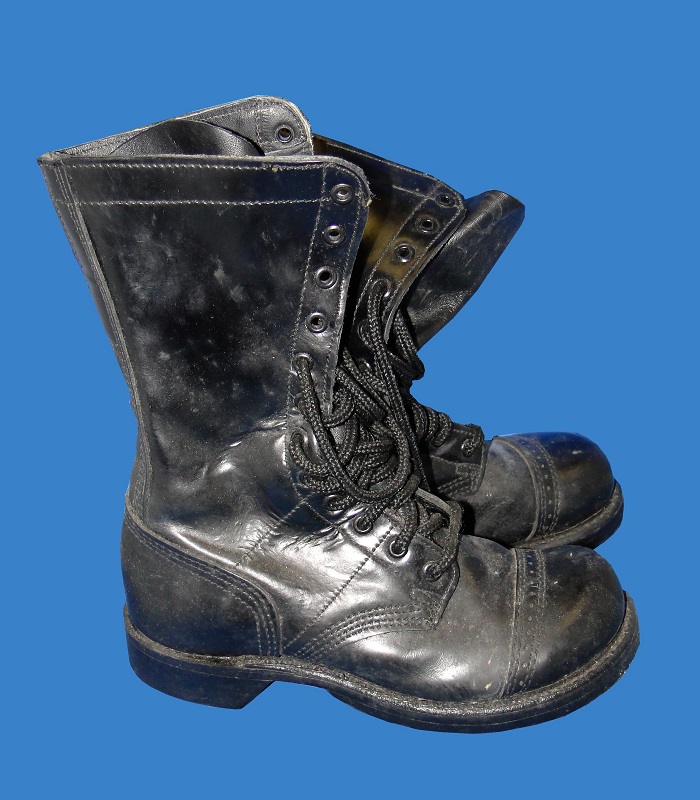
Figure 5c. Leather boots.
15. Attaching Insignia. Attach insignia to the uniform so that they will rest firmly without turning. Embroidered insignia are attached to the uniform by sewing only, with the stitching blending with the background. To attach insignia, refer to figure 6, and proceed as follows:
a. Service Cap Insignia. Secure the service-cap insignia (A) through the front eyelet provided on the front piece of the cap.
b. "US" Insignia. While you are in basic training, attach the "US" insignia on both coat lapels and both shirt collar ends; thereafter attach the "US" insignia (B) on the right lapel as shown in D and E.
c. Unit Insignia. Attach the unit insignia, when appropriate, on the garrison cap as shown in C.
d. Branch-of-Service Insignia. After you have been assigned to a service, you will be issued the branch-of-service insignia. Attach it as shown in D and E. e. Sleeve Insignia. Attach sleeve insignia, when appropriate, on the sleeves as shown in F.

Figure 6a. Placement of insignia.
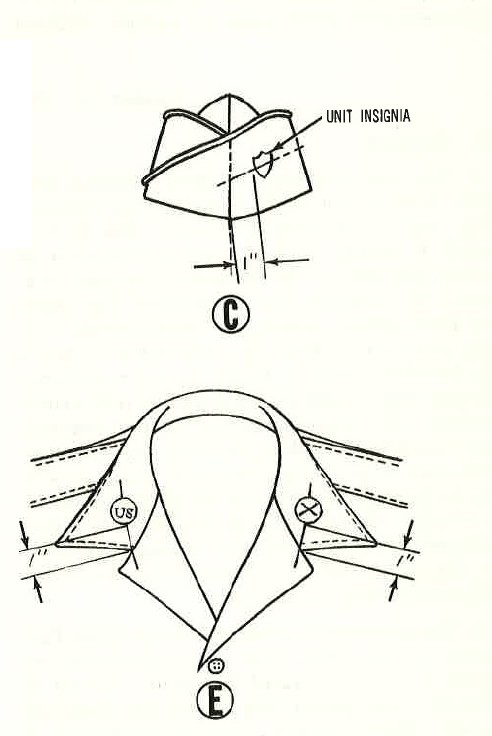
Figure 6b. Placement of insignia - continued.
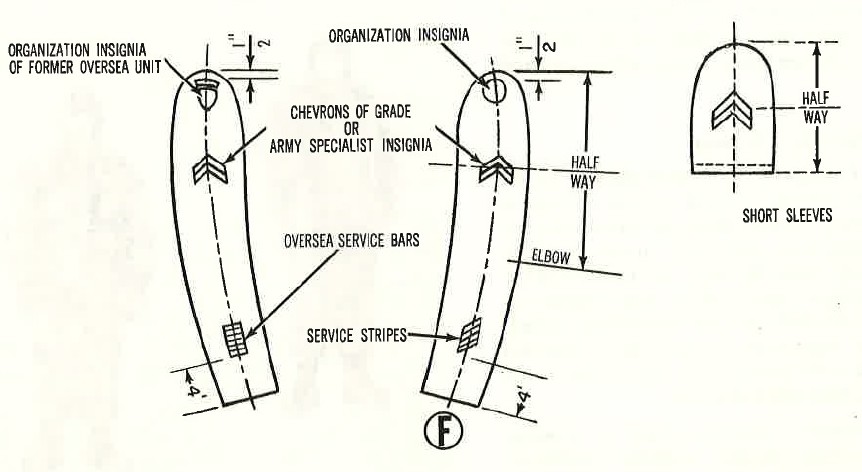
Figure 6d. Placement of insignia - continued.
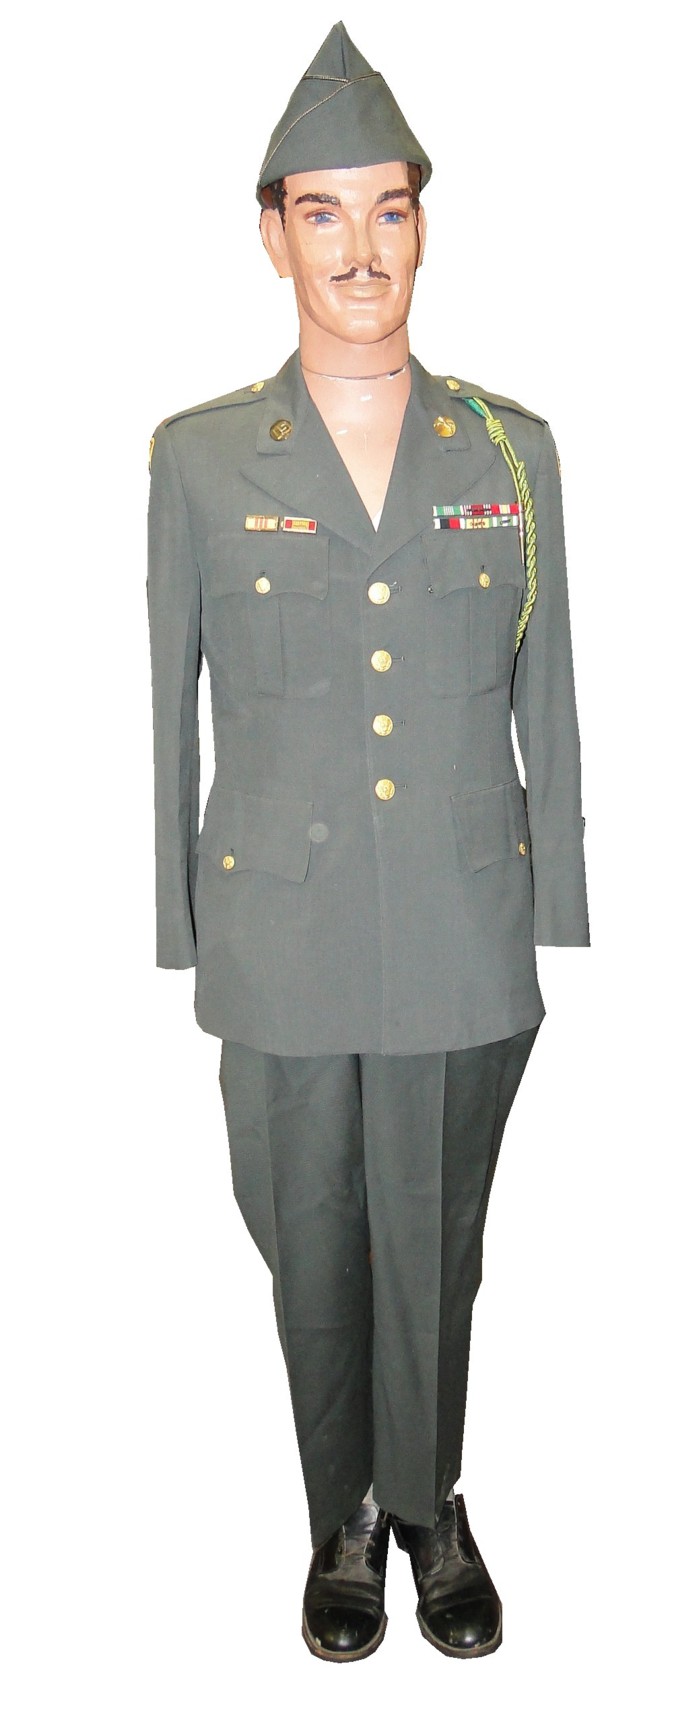
Figure 6c. Army Class A uniform - continued.
16. Care and Maintenance You will be provided a cash allowance for the replacement and maintenance of uniform clothing which you have been furnished or will be furnished. For instructions on the care and maintenance of items of the initial clothing allowance, refer to chapter 2.
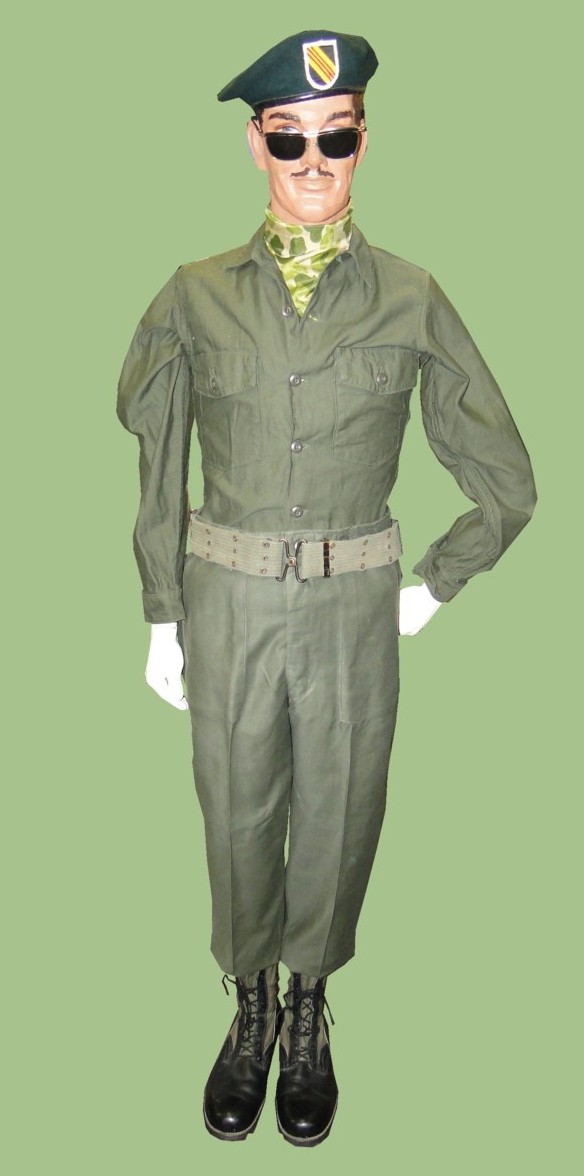
Figure 6e. OD Sateen uniform with special forces beret.
17. General
a. You wear clothing for three principal reasons- to cover your body, to protect you and your skin, and to aid body functions. The first is mainly to comply with custom; the second is to protect you against the elements, man made hazards, cuts, scratches, and insect bites. The third, and most critical, reason you wear clothing is to keep your body sufficiently comfortable so that it can function normally. Under certain conditions; the best way to keep cool is to put on lightweight clothing; for example, during intense sunlight, you should wear clothing to keep the heat away from your body. Under other conditions, the best way to keep watm is to take off some clothing or to ventilate the clothing, by adjusting openings designed in the garment. For example, overheating (sweating) causes clothing to become damp, and damp clothes can be cold.
b. The protective clothing and body armor furnished to you, when your duty assignment requires it, is an integrated system. It will aid in protecting you against both natural and manmade hazards. Within present technical capabilities, it provides you with the best that can be produced to maintain your personal safety, efficiency, and health.
18. Cold-Weather Clothing
a. Design Principles.
Principles utilized in the design of cold weather clothing include removable insulation, use of several separate layers, and devices for ventilation. Insulation material slows the flow of heat from the body to the outside. In the layer principle, layers of air are trapped between layers of clothing. The ventilating principle allows the outside air to cool the overheated areas by means of openings in the clothes, such as cuffs, flies, and front closures.
b. Cold Weather Conditions.
Cold or freezing conditions present special clothing problems. There are two types of cold weather conditions which require the application of certain concepts and principles in the design of cold weather clothing- cold-wet and cold-dry. During cold-wet conditions, temperature differences as great as 30 to 40 degrees F. may occur between the warmest time of day and the coldest time of night, causing the ground to freeze at night and thaw during the day. This freezing and thawing, often accompanied by rain or wet snow, causes the ground to become muddy or slushy. During cold dry conditions, the average monthly temperature is lower than 14 degrees F. The ground is usually frozen, and the snow is usually dry. Frequently, strong winds increase the need for protection from the cold.
c. Ensembles.
The cold-wet ensemble (fig 7) protects you against the hazards of changing temperatures, rain, wet snow, mud, and slush of a cold-wet environment. The cold-dry ensemble (fig 8) protects you against the hazards of extremely low temperatures, high winds, and snow of a cold-dry environment.
d. Detailed Information.
TM 10-275 provides detailed information and guidance on the use, care, and fitting of both cold-wet and cold-dry, cold weather clothing.
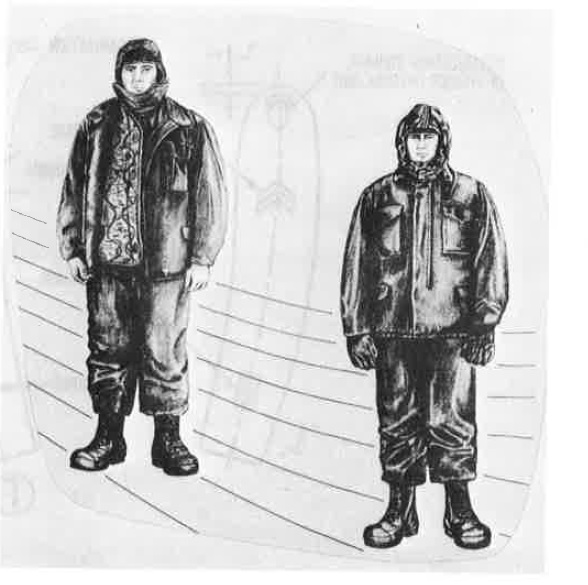
Figure 7. Cold-Wet ensemble.
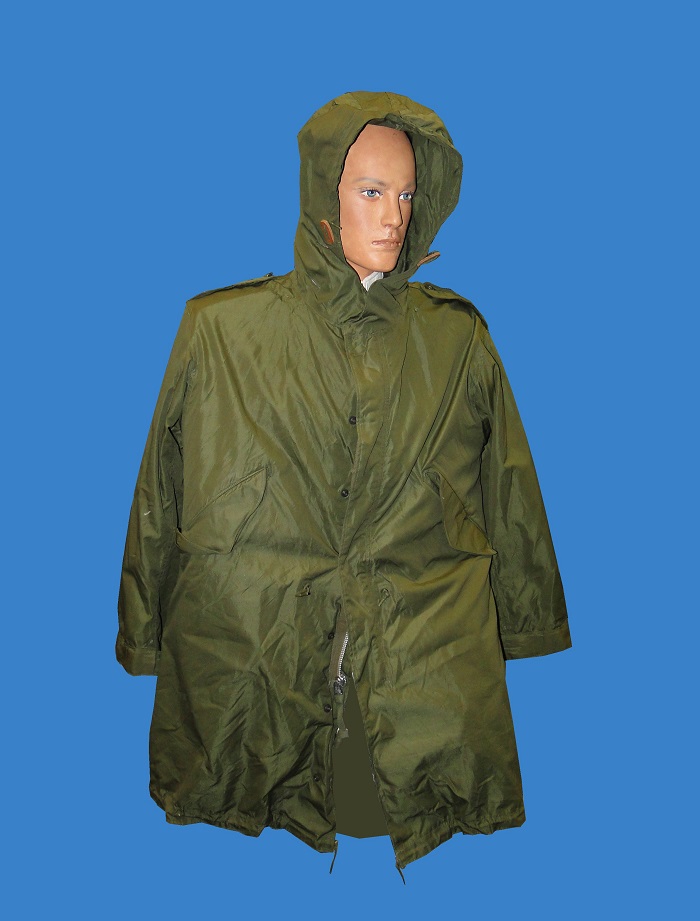
Figure 7a. Cold-Wet ensemble.
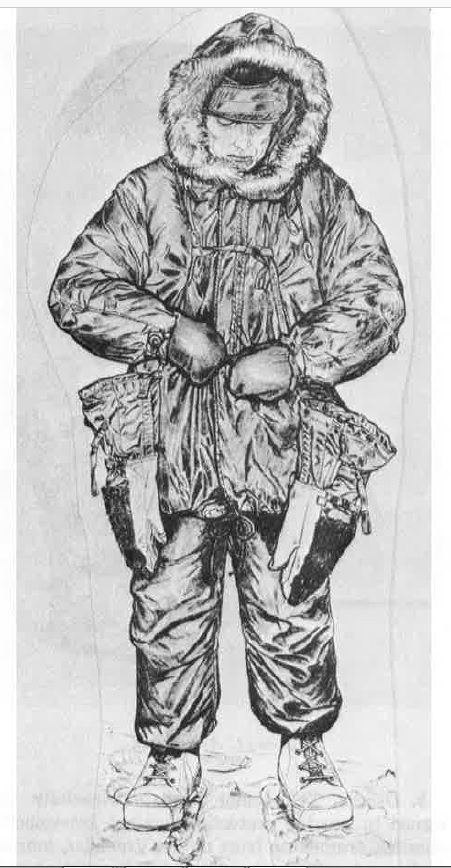
Figure 8. Cold-Dry ensemble.
19. Hot Weather Clothing
a. Design Considerations.
The design of clothing for hot climates must take into consideration the principles by which heat is dispersed from body surfaces-radiation, convection, and evaporation. Other factors that affect the design of hot weather clothing include the need for insect protection, camouflage, and unhampered mobility.
b. Ensemble.
The hot weather ("tropical") ensemble (fig 9) is made of a lightweight, tightly woven material to provide protection against wind and insects ; yet the material is light enough to dry quickly after being soaked by perspiration or water. The clothing is loose fitting and has adjustable openings for airflow ventilation. Adjustable closures are at the waist, neck, mid-body, and legs.
c. Detailed Information.
TM 10-276 provides detailed information and guidance on hotweather clothing and equipment.
20. Wet Weather Clothing (Rainsuit).
The wet-weather clothing (fig 10) consists of a coat-styled parka and a pair of coated overalls. Use the clothing for protection in wet and cold-wet environments. Clean and store coated items as described in paragraph 9.
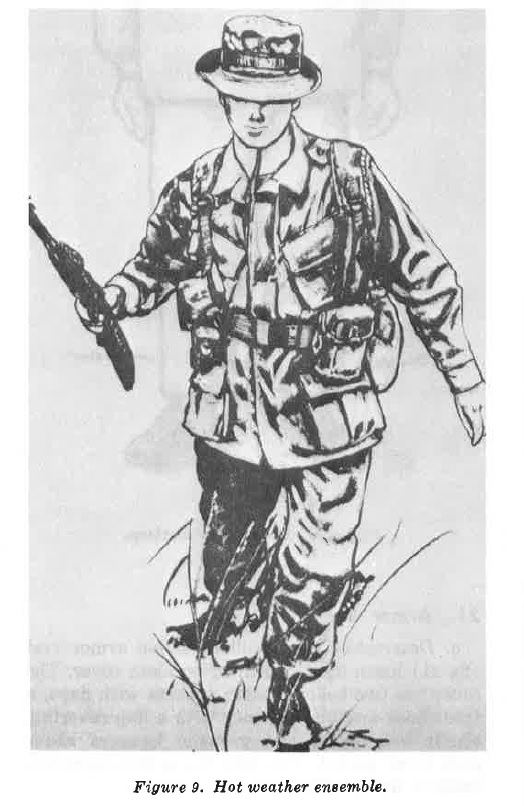
Figure 9. Hot weather ensemble.
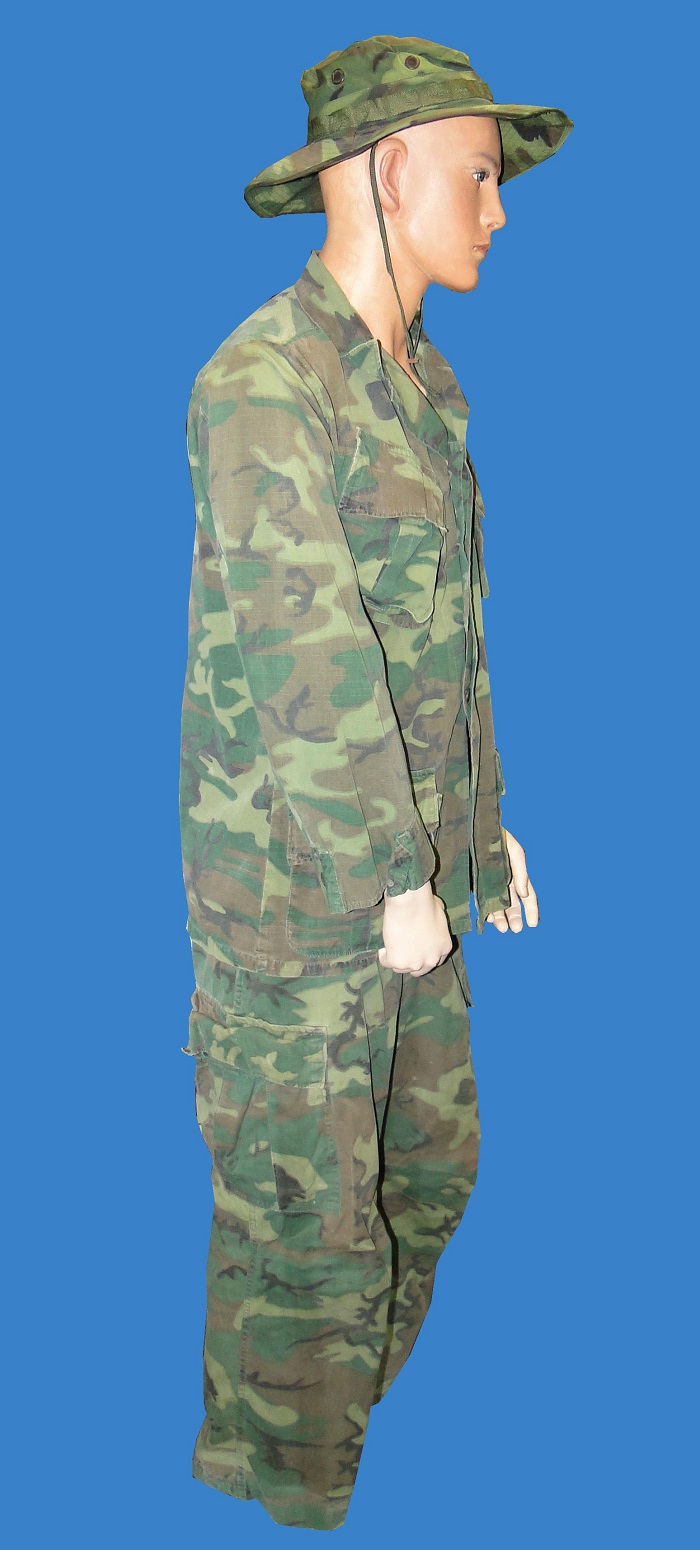
Figure 9b. Hot weather ensemble - Camouflaged.
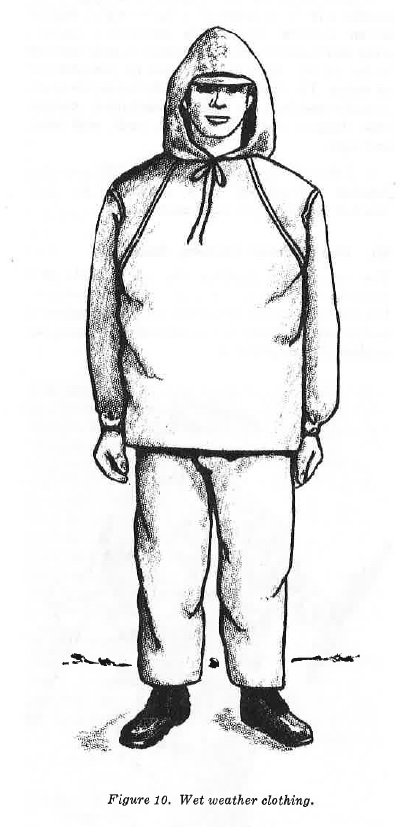
Figure 10. Wet weather clothing.
21. Armor Vest
a. Description.
The ballistic nylon armor vest (fig 11) has a lightweight, nylon cloth cover. The cover has two bellows patch pockets with flaps, a front hook-and-pile fastener with a flap covering, elastic side laces, and grenade hangers above each front pocket. The vest has a three-quarter, ballistic nylon collar.
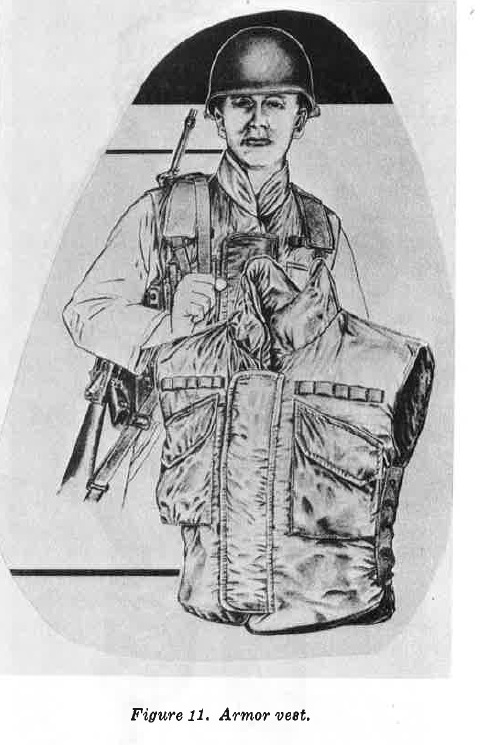
Figure 11. Armored vest.
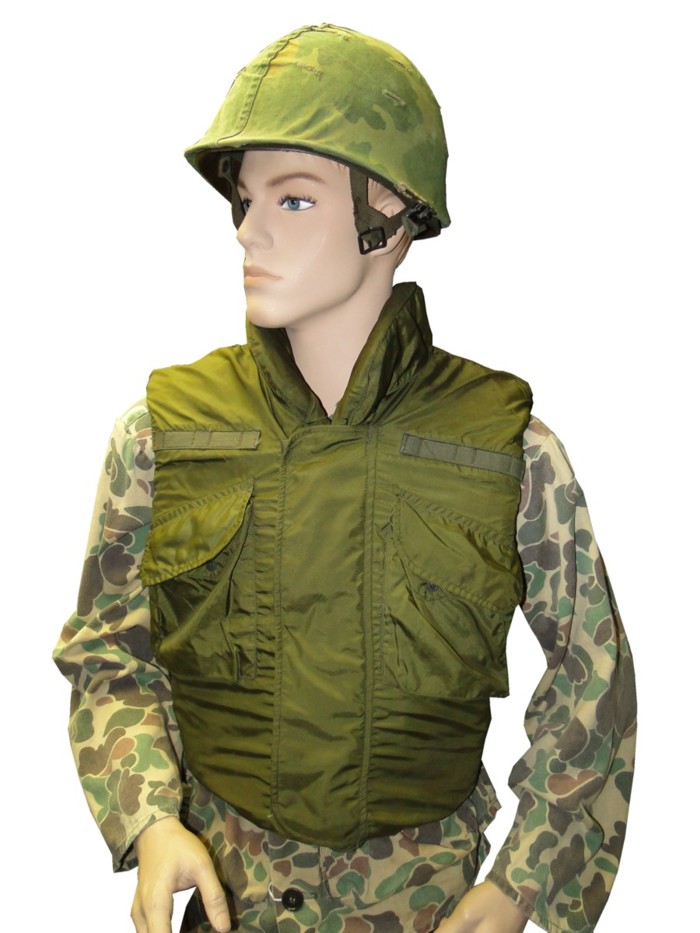
Figure 11a. Armored vest with M-1 helmet. Wearing early Duck Hunter camouflage.
b. Design.
The armor vest is especially designed to provide protection against low-velocity missiles, fragments from mines, grenades, mortar shells, and artillery fire. The vest does not protect against small-arms fire, although it tends to decrease its severity. The vest consists of a ballistic nylon filler which includes layers of tough nylon cloth stitched together to form the fragmentprotective portion of the vest. A vinyl-plastic envelope covers the ballistic nylon filler, and this in turn is enclosed in a lightweight nylon cloth cover. The vinyl-plastic envelope forms a waterproof barrier against damage from moisture, dirt, and other foreign matter. The lightweight, nylon cloth cover provides camouflage, wear resistance, and additional protection for the inner parts of the vest. The cover is equipped with pockets and grenade hangers.
c. Fitting.
Table 3 indicates the size vest you should select based on your chest measurements. Adjust the side laces so that the webbing strips with the lace eyelets touch, or butt, each other. If the vest is too tight, have someone loosen or tighten the elastic laces on each side. Check the fit while you are bending, stooping, and kneeling.
|
d. Wear.
Wear the armor vest for training or combat missions. Wben properly worn, the vest protects certain vital areas against low-velocity mine, grenade, mortar shell, and artillery fragments, which cause most combat casualties. The vest does not, however, protect against small arms fire. It does tend to decrease the severity of wounds from rifles and machine guns. Wear the armor vest with any type of combat clothing, and wear it at all times when you are within range of enemy weapons. Wear the vest as indicated with the following uniforms or ensembles:
(1) Utility (field) uniform and hot-weather ensemble.
Wear the vest over your shirt or coat, and under any additional layers of clothing.
(2) Cold-wet ensemble.
Wear the vest over your field shirt and under the field coat with liner.
(3) Cold-dry ensemble.
Wear the vest over the field shirt and under the field coat with liner and the poncho with liner.
e. Inspection.
Periodically examine your vest for-
(1) Tears, punctures, or damage to the outer nylon cover.
(2) Bunching evidenced by lumps or distortion in the ballistic nylon filler. Bunching is the creasing and folding of the nylon filler within the outer case.
(3) Noticeable increase in weight, indicating the nylon filler has become wet.
(4) Damaged or dirty hook-and-pile fastener.
(5) Broken or missing elastic laces.
f. Care.
Neglect in keeping your armor vest clean and in usable condition will result in a shorter service life for the vest. A vest not properly worn may result in Jess protection, and less protection may result in needless injury. Do not use the vest as a seat cushion or a pillow. Careless handling and using the vest for purposes other than body protection may damage the vest or may cause the protective nylon filler to bunch and leave you unprotected.
(1) Repairing.
Turn in damaged vests as soon as possible, but until it is possible, you can make certain temporary repairs. When the outer cover shows damage, first check to see whether the inner vinyl-plastic envelope has been damaged. If so, cover the damaged portion of the envelope with waterproof tape to prevent moisture from 1�eacbing the ballistic layers. Next, repair the outer nylon cover with tape to p1�event further damage. When bunching occurs, try to remove it by inserting your hands through the vest armholes, lifting and shaking the ballistic layers back into position. Then smooth the whole area with your hands.
(2) Cleaning.
Clean your vest regularly to prolong its protective life. Do not use cleaning solvents or gasoline. There are two methods for washing your vest; both methods require warm water and soap or detergent. One method is to wash the vest in a shower or stream. First, brush off mud and loose dirt with a soft brush or cloth. Then take off your clothes, and put on the vest. Wet the vest in a stream or shower, soap it thoroughly, and rinse. To get all sides of the vest clean, wash it while wearing it frontwards, backwards, and inside out. The other method is to hand wash the vest by first removing the laces, brushing off mud and loose dirt, and then washing and rinsing it. After washing by either method, air-dry the vest, keeping it away from direct heat and open flame.
(3) Storing.
To properly store the armor vest, proceed as follows:
(a) Clean the vest thoroughly.
(b) Clean the hook-and-pile fastener, untie the elastic laces, unlace the front and rear duck webbing, and open side flaps.
(c) Place the vest in a box, a carton, or an open bin located inside a building or tent.
(d) Cover the vest with a cloth or plastic sheet to keep out dust, dirt, and moisture.
(e) Do not fold the vest.
22. Helmet, Helmet Liner, and Camouflage Band.
a. Helmet.
(1) Use. Wear the helmet over the helmet liner for protection against ballistic-type fragmentation (such as that from artillery fire and grenades) and for protection against ricocheting bullets. The helmet and liner may be worn over the cotton utility cap or over the poncho hood.
(2) Care. Although the helmet is a sturdy item that can withstand rough treatment, the following rules must be observed: Do not use the helmet as a cooking pan; heat destroys the temper of the metal, weakens the helmet, and reduces its protective characteristics. Do not use the helmet as a seat; the chinstrap loops may be snapped. Do not use the helmet as a shovel or hammer; the camouflage effect will be scraped off.
b. Helmet Liner.
The helmet liner must be worn with the M-1 helmet for comfort and added ballistic protection. It may be worn, without the helmet, as a head covering. There are basically two types of helmet liners. Each is provided with a neckband; the liner used by parachutists is also provided with a chinstrap assembly. Never use the liner as a seat or pillow.
(1) Liner (without chinsfra,p assembly).
The helmet liner without chinstrap assembly consists of a reinforced plastic shell with a webbed suspension system (head band and cradle) clipped or riveted to the inside, a headband, and a neckband. (a) Headband.
The headband is a leather- lined web strap provided with six metal clips and a buckle for attaching and adjusting the headband to the liner. To install the headband in the helmet liner, proceed as follows:
1. Open the six headband clips, and adjust the headband to a larger size than your head size.
2. Put the headband on your head, making sure that the leather portion is against your forehead, that the buckle is at the back, and that the clips are open and are facing upward.
3. Adjust the headband to a snug fit, then remove the headband, and insert it into the liner so that the clips are toward the crown of the liner, and the buckle is at the back.
4. Place the clips over the fixed web strap of the head suspension band, making sure the two front clips are centered.
5. Close all clips.
6. Adjust the head height of the liner by lengthening or shortening the three adjustable straps of the cradle inside the liner. The straps are adjustable by means of buckles.
(b) Neck band.
The neckband, designed to replace the use of the chinstrap, is a web strap with a long adjusting tape sewed to each end and a short adjusting tape sewed to the middle. The smooth surface of the neckband is the surface opposite that to which the tapes are sewed. To install the neckband, proceed as follows:
1. Thread the two long tapes into the small buckles at each side of the liner, making sure the smooth surf ace of the neckband faces the front of the liner.
2. Thread the short tape into the rear buckle.
3. Make certain all tapes are straight and free of kinks.
4. Put the liner on your head, and adjust to fit by tightening the long tapes uniformly so that the neckband fits snugly and comfortably against the back of the neck. Pull the short tape to take up the slack.
(2) Liner (with chinstrap assembly).
The helmet liner with chinstrap assembly is similar in design to the helmet liner without chinstrap assembly. To attach the chinstrap, place the liner on your head so that the chinstrap suspension bands hang down. Hold the chinstrap against your chin with the cross band at the front and the smooth side of the eyelets against your cheek. Thread the ends of the chinstrap into the bucldes, and tighten them uniformly until the liner is held down firmly on your head.
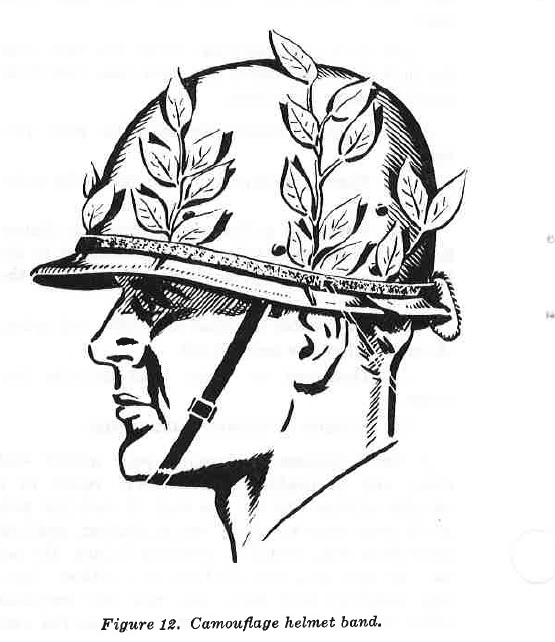
Figure 12. Camouflage helmet band.

Figure 12a. Camouflage helmet - M1.
c. Camouflage Band. The camouflage helmet band (fig 12) is an elastic band which may be fitted around the helmet or helmet liner at the base, above the rim. Use the band to hold in place a camouflage headnet or other camouflage material, such as foliage.